Frontier Defense: A Guide
|
The Harvester Difficulties - [Expand] Enemies - [Expand] Waves - [Expand] Aegis Upgrades - [Expand] |
The Harvester
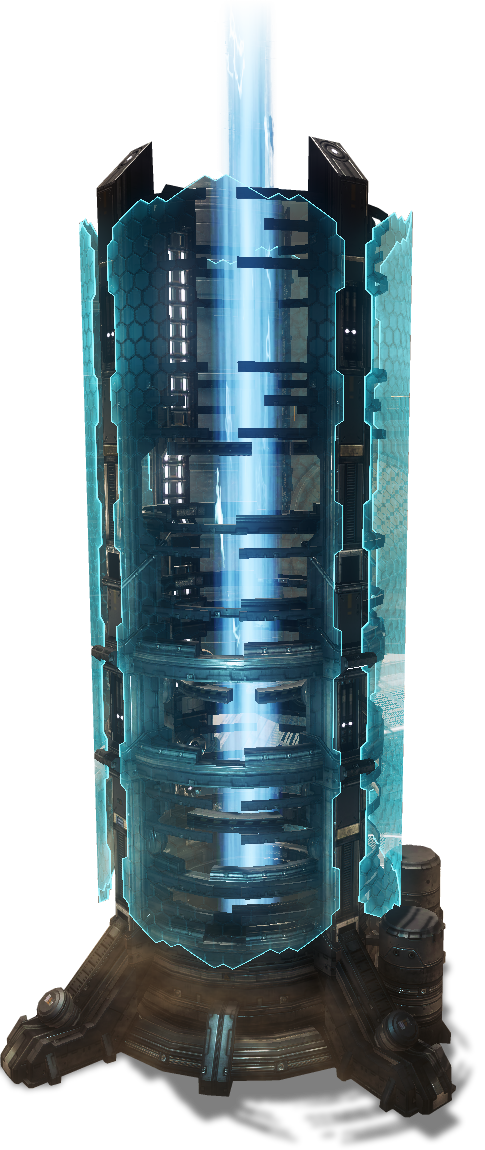 |
• Variable amount of shields, determined by difficulty. • Just like Titan or ship shields, electric weapons deal more damage to the shields. Fortunately, the only electric weapons the enemy NPCs have access to are Arc Titans. • Once depleted, the Shields will begin to regenerate after 10 seconds without taking damage, taking another 10 seconds to completely recharge from empty. • Although the HP value is fixed at 25000, the Harvester is still affected by a difficulty's damage multiplier. |
| ⤴ Top | |
Difficulties
EasyUnlocked Immediately | |
 |
"Crush the opposition." • Players cannot share money through the Armory. • Enemy Titans have 5000 less HP. • Enemy Reapers have 2000 less HP. • Mortar Spectres take 10 seconds to set up before firing. • Grunts do not have anti-Titan weapons. • $700 per wave completed. • The Harvester has 6000 shields. |
NormalUnlocked Immediately | |
 |
"Recommended for experienced players." • Enemy Titans have 2500 less HP. • Enemy Reapers have 1000 less HP. • Mortar Spectres take 10 seconds to set up before firing. • Grunts do not have anti-Titan weapons. • $700 per wave completed. • The Harvester has 6000 shields. |
HardAegis Level 5 with any Titan | |
 |
"Skilled play is required." • Enemy Titans and Reapers have normal HP. • Mortar Spectres take 5 seconds to set up before firing. • Mortar Spectres deploy a Particle Wall while preparing to fire. • Grunts have 2 anti-Titan weapons per squad. • Enemies deal 1.5× damage; this applies to the Harvester as well as players. • $600 per wave completed. • The Harvester has 5000 shields. |
MasterAegis Level 11 with any Titan | |
 |
"Only the best of the best will succeed." • Enemy Titans and Reapers have normal HP. • All enemy Titans deploy with overshields. • Mortar Spectres take 5 seconds to set up before firing. • Mortar Spectres deploy a Particle Wall while preparing to fire. • Grunts have 4 anti-Titan weapons per squad. • Some Grunt squads have Shield Captains. • Enemies deal 2.5× damage; this applies to the Harvester as well as players. • $600 per wave completed. • Earn/Core meter rate is ~70% the rate in other difficulties. • The Harvester has 4000 shields. • Pilots' anti-Titan weapons have finite ammo reserves. |
InsaneFeatured Mode, rotating map | |
 |
"You will not survive." • Enemy Titans and Reapers have normal HP. • All enemy Titans deploy with overshields. • Mortar Spectres take 5 seconds to set up before firing. • Mortar Spectres deploy a Particle Wall while preparing to fire. • Grunts have 4 anti-Titan weapons per squad. • Some Grunt squads have Shield Captains. • Enemies deal 2.5× damage; this applies to the Harvester as well as players. • $600 per wave completed. • Earn/Core meter rate is ~70% the rate in other difficulties. • The Harvester has 4000 shields. • Pilots' anti-Titan weapons have finite ammo reserves. • Minimap is disabled. • No retries. |
| ⤴ Top | |
Enemies
Grunt | |
 |
"The tip of the spear." • 50 HP • Typically only carry small arms, but on Master and above they can also swap to Charge Rifles or MGLs. • Deploy in squads of 4 from dropships and droppods. |
Shield Captain | |
 |
"Grunt Captain carrying a protective energy shield. Kill the Captain to destroy the shield." • 50 HP • Only appear on Master or above. • Will lead Grunts with a small forward-facing Particle Wall projected in front of them. The Wall has 3500 HP, and coming into contact with it as a Pilot will deal damage and apply an EMP effect. Unlike other Particle Walls, grenades that hit the wall will be completely absorbed rather than just bouncing off. • I say "lead", but they actually have the same AI as any other Grunt. They'll typically end up at the front of a group because the game tries to put them nearest the door in a droppod, but they can occasionally fall behind the rest of their squad or get held up because a Titan made them pee themselves or something. • 1 will deploy alongside other Grunts from a dropship or droppod. |
Mortar Spectre | |
 |
"Attacks the Harvester with mortar shells from rooftops." • 100 HP • Once they hit the ground, Mortar Spectres head to the nearest of several preset locations on the map and prepare to bombard the Harvester. • Not as easy to stumble as Grunts, and cannot be hacked. • On Hard and above, they will take only 5 seconds to begin firing, otherwise they will take 10 seconds. • Also on Hard or above, they'll deploy a Particle Wall facing towards the Harvester, forcing Pilots to maneuver around or over them to eliminate them. • Deploy in squads of 4 from droppods. |
Stalker | |
 |
"Watch your step! Stalkers explode when stepped on." • 150 HP • March straight to the Harvester where they will immediately hit the ground and detonate their battery packs, dealing ~800 damage with their full detonation sequence. • After sustaining some damage (either 80 at once or 50 in the span of a second), Stalkers will pause movement for about 3 seconds before making a mad sprint for the Harvester. • Stepping on one will deal 500 damage to your Titan from their explosion. • Normally deploy unarmed, but on Hard and above, carry EPGs. Because of the 2.5× damage, their EPGs are very capable of killing a Pilot in one hit (247 damage on a direct hit, which is just a bit lethal to a Pilot), and they can do some serious damage to a Titan with sustained fire, or even to the Harvester while approaching (a whopping 1750 per bolt on impact). • Deploy in squads of 4 from droppods. |
Reaper | |
 |
"Duel-wields rocket launchers and launches Ticks at enemies." • 3000 base HP (heavy armor) • Similar to Mortar Spectres, Reapers will jump to preset locations where they will launch an array of 5 Ticks into the air. • Deploying Ticks is not their priority, and if there isn't a location for them to jump near enough or they don't seem to think there's a need for more Ticks they'll bumrush the Harvester and open fire on it. • Just like in PVP, they typically deploy in pairs near one another. |
Tick | |
 |
"Rushes targets and explodes." • 100 HP • Once they've spotted a Pilot or Titan within 12.5 feet, they'll chase them for 10 seconds before detonating. Otherwise, they'll head for the Harvester. • The explosions are weaker against Pilots than in PVP, doing 130 within 12.5 feet, but much stronger against Titans and the Harvester doing 600. • Numerically speaking, they have a guaranteed kill against Pilots if they're within 14.7 feet of the explosion, considerably smaller than their whopping 17.2 feet lethal radius in PVP, but still more than threatening enough to pose a serious threat to any inattentive Pilots on the ground. • Can deploy in groups of 4 from droppods, or up to 5 can be launched at a time from a Reaper. |
Cloak Drone | |
 |
"Cloaks other units." • 350 HP • Hovers ~19 feet above groups of infantry or up to 2 Titans and casts a cloak effect on them. The Drone itself is still visible and marked on the map, but curiously it seems to be non-coporeal when attached to its allies and can occasionally poke into a ceiling above them. • If the drone feels exceptionally threatened or the allies it is cloaking are eliminated, it will zoom off to find replacements. On occasion, it might even straight up teleport, usually done slightly out of sight. • Can be locked on to by any kind of Smart Ammo, meaning that the Archer, Tracker Rockets, or the MTMS can target it. • Usually deploy from the sky 1 at a time alongside their allies. |
Plasma Drone | |
 |
"Shoots nasty blue balls of plasma at the Harvester... and you!" • 100 HP • Zooms towards the Harvester from above, then continues to circle it. • Will fire potshots at the Harvester and occasionally any Pilots or Titans that aggro it. • Each bolt does 15-20 damage to Pilots and 230-250 damage to Titans and the Harvester. • Always deploy in groups of 4 from above the map. |
| ⤴ Top | |
Aegis Upgrades
Ion | |
Split Shot PowerAegis Rank 2 | |
 |
"Split Shots deal more damage." • Increases Splitter Cannon's damage per bolt when firing in ADS from 15.4 × 3 to 19.25 × 3 against infantry and 46.2 × 3 to 61.6 × 3 against Titans to 22 × 3 to 27.5 × 3 and 66 × 3 to 88 × 3 respectively. • With the Refraction Lens kit equipped, this becomes an increase from 12.1 × 5 to 15.13 × 5 against infantry and 36.3 × 5 to 48.4 × 5 against Titans to 15.4 × 5 to 19.25 × 5 and 46.2 × 5 to 61.6 × 5 respectively. |
Chassis UpgradeAegis Rank 5 | |
 |
"Ion's Health is increased." • Increases Ion's total HP from 10000 to 12500, equivalent to an Ogre. |
Energy StorageAegis Rank 8 | |
 |
"Ion's max Energy is increased." • Increases Ion's total Energy pool from 1000 to 1250. |
Split Shot EfficiencyAegis Rank 11 | |
 |
"Split Shots require less energy." • Decreases the energy consumption of the Splitter Cannon from 30 per shot to 20 per shot. • With the Refraction Lens kit equipped, this becomes a decrease from 34.5 per shot to 23 per shot. |
Shield UpgradeAegis Rank 14 | |
 |
"Ion's max Shield is increased." • Increases Ion's overshield capacity from 2500 to 3750. |
Energy RegenAegis Rank 17 | |
 |
"Ion regenerates Energy 25% faster." • The total time to fully regenerate your energy from empty is cut from 15.63 sec to 12.5 sec. |
Reflex CannonAegis Rank 20 | |
 |
"Kills extend the duration of Laser Core." • Titan kills grant an extra 2.5 seconds to core time. • Reaper kills grant an extra 1.5 seconds. • Any other kill grants an extra 0.5 seconds. |
| ⤴ Top | |
Scorch | |
Double ThreatAegis Rank 2 | |
 |
"Thermite Launcher now fires two shots before needing to reload." • Instead of firing and instantly reloading, the Thermite Launcher will switch to a segmented reload system just like the Mastiff. • Inserting a shell will take 1.6 seconds, while closing the launcher will take 0.8 seconds. • The Launcher will have a rate of fire 1.2 shells per second (72 RPM) and be fired semi-auto. |
Chassis UpgradeAegis Rank 5 | |
 |
"Scorch's Health is increased." • Increases Scorch's total HP from 12500 to 15000, equivalent to a Monarch with Superior Chassis activated. |
Hot StreakAegis Rank 8 | |
 |
"Thermite damage builds up a Core Meter multiplier." • Damage done with thermite adds to a new meter. When the meter is full, all core gain is earned at 1.5× normal rate, as long as you keep doing damage to maintain the meter. • Note that this is only caused specifically by thermite damage, meaning only thermite from Launcher shells, ignited Incendiary Traps, Flame Wall, and Flame Core itself maintain the meter. |
Roaring FlamesAegis Rank 11 | |
 |
"Thermite damage is increased." • All thermite damage increased by 20%. All of it. Follows the same rules as Hot Streak with what its bonus applies to. |
Shield UpgradeAegis Rank 14 | |
 |
"Scorch's Max Shield is increased." • Increases Scorch's overshield capacity from 2500 to 3750. |
Triple ThreatAegis Rank 17 | |
 |
"Thermite Launcher now fires three shots before needing to reload." • It's Double Threat, but Tripled. Same numbers apply to reload times and fire rate. |
Explosive BarrelsAegis Rank 20 | |
 |
"Igniting an Incediary Trap now triggers an initial explosion." • Incendiary Traps will have an initial burst of damage when ignited, doing an instant 500 damage within 22 feet. |
| ⤴ Top | |
Northstar | |
Explosive TrapsAegis Rank 2 | |
 |
"Tether traps explode when they break." • Tether Traps will explode when either destroyed or when expiring, doing an instant 1000 damage within 22 feet. |
Chassis UpgradeAegis Rank 5 | |
 |
"Northstar's health is increased." • Increases Northstar's total HP from 7500 to 10000, equivalent to an Atlas. |
Plasma Railgun: Quick ChargeAegis Rank 8 | |
 |
"Plasma Railgun charges faster." • The Railgun will be fully charged in 1.35 seconds, decreased from the base 2.25 seconds. |
Trap MasteryAegis Rank 11 | |
 |
"Northstar has two charges of Tether Traps." • Each individual charge will have the same cooldown as normal, 20 seconds. |
Shield UpgradeAegis Rank 14 | |
 |
"Northstar's max shield is increased." • Increases Northstar's overshield capacity from 2500 to 3750. |
Plasma Railgun: Critical HitAegis Rank 17 | |
 |
"Plasma Railgun critical hits deal increased damage." • Increases the multiplier for critical hits with the Railgun from 1.5× to 2.0× damage. |
Twin ClusterAegis Rank 20 | |
 |
"Cluster Missile now fires two missiles." • There is a 0.1 sec delay between each rocket firing. |
| ⤴ Top | |
Ronin | |
Sword MasteryAegis Rank 2 | |
 |
"Melee attacks deal more damage." • Base melee damage increased from 625 to 781.25. • Sword Core melee damage increased from 2025 to 2531.5. |
Chassis UpgradeAegis Rank 5 | |
 |
"Ronin's health is increased." • Increases Ronin's total HP from 7500 to 10000, equivalent to an Atlas. |
Ghost in the MachineAegis Rank 8 | |
 |
"Phase Dash has two charges." • Individual charges have a slightly faster cooldown than the base single charge, taking 10.4 seconds to recharge instead of the original 12.5 seconds. |
Kinetic TransferAegis Rank 11 | |
 |
"Incoming blocked damage charges Sword Core." • Earn 0.7% of your core meter for each point of damage you block, as you would if you weren't blocking. |
Shield UpgradeAegis Rank 14 | |
 |
"Ronin's max shield is increased." • Increases Ronin's overshield capacity from 2500 to 3750. |
WraithAegis Rank 17 | |
 |
"Phase Dash travels further." • More accurately, the dash itself is 50% faster, for a total speed burst of 64 MPH increased from 42.5 MPH. • Effect time is unchanged. |
BlademasterAegis Rank 20 | |
 |
"Sword Core attacks generate Shield. Sword Core's duration is doubled." • Each strike to a Titan or Reaper with Sword Core active gives you 500 shields. • Any other target gives you 250 shields. • Sword Core lasts 24 seconds, increased from 12 seconds. |
| ⤴ Top | |
Tone | |
40mm: Splasher RoundsAegis Rank 2 | |
 |
"40mm rounds deal damage over a larger area." • Increases the inner blast radius of 40mm shells from 1 foot to 6.25 feet. • Increases the outer blast radius from 9.3 feet to 14 feet. |
Chassis UpgradeAegis Rank 5 | |
 |
"Tone's Health is increased." • Increases Tone's total HP from 10000 to 12500, equivalent to an Ogre. |
Sonar Weak PointsAegis Rank 8 | |
 |
"Enemies take 25% increased damage while revealed by Sonar Pulse." • No special rules here, this is probably as straight forward as it gets. As a reminder, Sonar Pulse's effect lasts 5 seconds and has a radius of 78 feet. |
40mm: Extended AmmoAegis Rank 11 | |
 |
"40mm ammo capacity is doubled." • Increases capacity from 12 to 24 shells for the 40mm. |
Shield UpgradeAegis Rank 14 | |
 |
"Tone's max Shield is increased." • Increases Tone's overshield capacity from 2500 to 3750. |
Signal StrengthAegis Rank 17 | |
 |
"Sonar Pulse's duration is increased by 60%." • Increases the effect time of Sonar Pulse from 5 seconds to 8 seconds. The effects of Sonar Weak Points will also last that much longer, of course. |
Salvo Core BarrageAegis Rank 20 | |
 |
"Salvo Core fires more missiles." • Salvo Core will output 72 rockets, increased from the original 48 rockets, in the same amount of time as normal. |
| ⤴ Top | |
Legion | |
Piercing RoundsAegis Rank 2 | |
 |
"Predator Cannon rounds pierce through enemies." • Cannon rounds will go through any number of targets dealing full damage. |
Chassis UpgradeAegis Rank 5 | |
 |
"Legion's Health is increased." • Increases Legion's total HP from 12500 to 15000, equivalent to a Monarch with Superior Chassis activated. |
ExecutionerAegis Rank 8 | |
 |
"Close range Power Shot bypasses Doomed State." • Depleting an enemy Titan's HP with the Close Range Power Shot will instantly destroy them instead of dooming them. • Hint: Use it on Nuke Titans! |
RedirectAegis Rank 11 | |
 |
"Damage absorbed by Gun Shield recharges your Titan's Shield." • The ratio is 1:1, so every point of damage your gunshield absorbs is turned right back into Shields for you. |
Shield UpgradeAegis Rank 14 | |
 |
"Legion's Max Shield is increased." • Increases Legion's overshield capacity from 2500 to 3750. |
Drill ShotAegis Rank 17 | |
 |
"Long range Power Shot deals more damage each time it pierces an enemy." • For every target that a Long Range Power Shot shell goes through, its impact damage is multiplicatively increased by 50% with no cap. • Basically: 2000 to the first target, 3000 to the second, 4500 to the third, 6750 to the next... • Naturally, the starting and subsequent damage is all subject to the 15% damage decrease from Hidden Compartment's nerf. |
DreadnoughtAegis Rank 20 | |
 |
"Legion is equipped with all of his kits." • There is nothing to explain here. This is the best, and you know it. |
| ⤴ Top | |
Monarch | |
Energized SmokeAegis Rank 2 | |
 |
"Monarch's Electric Smoke gives her Shield." • Each second spent in her own Electric Smoke will give Monarch 100 shields, for a total of 1200 over the full 12 second duration. |
Chassis UpgradeAegis Rank 5 | |
 |
"Monarch's health is increased." • Increases Monarch's total HP from 10000 to 12500, equivalent to an Ogre. • Very stackable with Superior Chassis, for a grand total of 17250. |
XO-16: Sniper ConfigurationAegis Rank 8 | |
 |
"Reduces spread and enables toggle-zoom on the XO-16." • All base spread is halved, for a base spread of 1 degree from the hip and 0.5 degrees in ADS. • Combined with the Accelerator mod, your base spread becomes even further narrowed to 0.75 degrees from the hip and 0.25 degrees in ADS. • You can tap your Sprint key to zoom in like with the Railgun, and to the same zoom level as well (FOV of 25 degrees, ~3× zoom). |
Energized Smoke Lvl 2Aegis Rank 11 | |
 |
"Monarch's Electric Smoke gives friendly Titans Shield." • Same as the first Energized Smoke, but now it works for teammates as well. |
Shield UpgradeAegis Rank 14 | |
 |
"Monarch's shield is increased." • Increases Monarch's overshield capacity from 2500 to 3750. |
XO-16: Critical HitAegis Rank 17 | |
 |
"XO-16 deals additional damage against weak points." • Increases the multiplier for critical hits with the XO-16 from 1.5× to 1.75× damage. |
Apex TitanAegis Rank 20 | |
 |
"Monarch starts with a random tier 1 Core Upgrade." • The upgrade doesn't consume an upgrade slot, and it will select either upgrade that you don't already have equipped. This way, it could be possible to have both Arc Rounds and Missile Racks, for example. • The selected upgrade will be display under the normal 3 upgrade listings on Monarch's HUD as "Apex Upgrade:"; if you aren't happy with what you got, you totally can just self destruct and drop another one to re-roll. |
| ⤴ Top | |